
Water ruins basements quietly. It seeps through walls, settles under floors, and by the time you notice mould or damp patches, the damage is already done. Waterproofing stops that process early. Done right, it protects your home’s structure and turns a damp, unusable space into something solid and livable.
This guide covers the main methods, a clear step-by-step process, and the practical factors you need to weigh before starting work.
What Is Basement Waterproofing?
Basement waterproofing is the process of preventing water from entering a below-ground space. It covers walls, floors, and joints, the three places water most commonly finds its way in.
It applies to both new builds and existing homes. The method changes depending on your specific problem: where water is entering, how much pressure it carries, and whether you can access the outside of your foundation.
What Are the Common Basement Waterproofing Methods?
There are three recognised systems in the industry. Professionals refer to them as Type A, Type B, and Type C. Each one works differently. Choosing the wrong one for your situation costs money and causes problems later.
Type A – Barrier Systems (Membrane Waterproofing)
Type A is a physical barrier. You apply a waterproof membrane to the wall surface , either externally before backfilling, or internally using tanking products , and block water before it reaches the structure.
Common materials include bituminous sheet membranes, cementitious tanking slurry, liquid-applied coatings, and internal cavity drain membranes.
Where it works well: Solid walls with no active structural cracking. New builds before backfilling. Walls with low hydrostatic pressure.
Where it falls short: Any breach in the membrane lets water through. If the wall cracks or moves, the membrane can fail. External application on an existing home requires full excavation,expensive and disruptive.
Type B – Structurally Integral Waterproofing
Type B makes the concrete itself resistant to water. The mix includes waterproofing admixtures that reduce porosity. Water cannot move through the material because the pores are effectively closed.
This system only works on new construction. You cannot retrofit it into an existing basement. It requires specialist concrete specification and careful construction.
Where it works well: New basement builds where the structure can be designed from the ground up.
Where it falls short: Any crack in the structure creates a direct water path. It offers no solution for older homes.
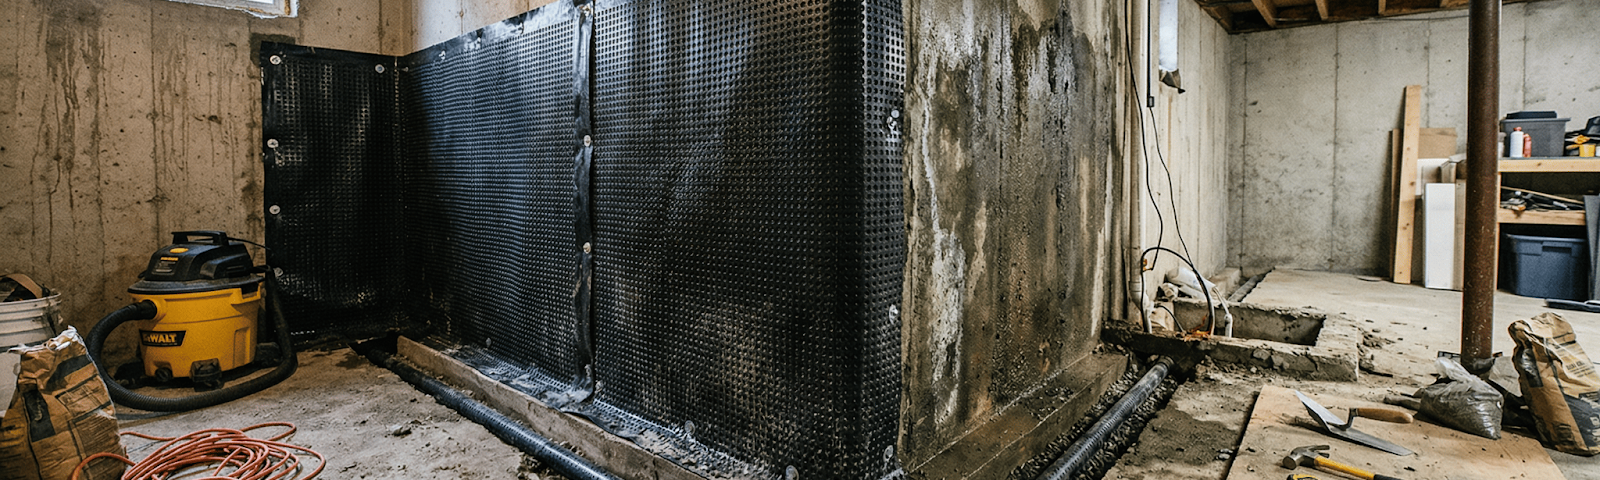
Type C – Cavity Drain Systems (Drained Protection)
Type C is the most widely used system for retrofit basement waterproofing in the UK and Europe. It does not stop water entering the structure. Instead, it intercepts water that gets in, channels it away, and pumps it out before it reaches your living space.
Here is how it works: a studded plastic membrane is fixed to the internal walls, creating an air gap between the wall and the membrane. Water seeping through collects behind the membrane, runs down into a perimeter drainage channel cut into the floor edge, flows into a sump chamber, and a submersible pump ejects it out of the building.
Where it works well: Existing basements with active water ingress. Homes where external access is not possible. Situations where hydrostatic pressure is high.
Where it falls short: The pump needs maintenance. If the pump fails and there is no backup, water accumulates. It also slightly reduces internal floor area.
Most homeowners retrofitting a basement use Type C. It tolerates structural movement, handles real water pressure, and does not depend on a perfect seal.
How Do You Waterproof a Basement Step by Step?
The process splits into two approaches: working from outside the building or working from inside. Both are valid. The right one depends on your site conditions.
External Waterproofing
Step 1 – Excavate. Dig down around the full perimeter of the foundation to expose the basement walls from footing to ground level.
Step 2 – Clean and prepare the wall. Remove loose material, old coatings, and contamination. The surface needs to be solid and clean before anything goes on it.
Step 3 – Repair structural defects. Fill cracks with hydraulic cement or specialist repair mortar. Do not apply a membrane over an unrepaired crack.
Step 4 – Apply the waterproof membrane. Roll or brush the membrane over the full wall face. Cover all joints, corners, and wall-to-footing connections carefully — these are the failure points.
Step 5 – Fix a drainage board. A dimpled drainage board goes over the membrane. It protects the membrane during backfilling and channels groundwater downward and away.
Step 6 – Lay perimeter drainage pipe. A perforated pipe at the base of the wall collects water and directs it to a drain or sump system.
Step 7 – Backfill. Use granular material. Compact it in layers. Forcing backfill against an unprotected membrane tears it.
External waterproofing is the most thorough approach, but it is only practical where full excavation is feasible.
Can You Waterproof a Basement from the Inside?
Yes , and for most homeowners with an existing basement, it is the only realistic option.
Internal waterproofing does not seal water out of the wall. It controls water that enters. That distinction matters. If a contractor promises to “seal” your basement completely from the inside using just a painted-on product, that claim is almost always overstated.
A properly installed internal system works like this:
Step 1 – Clear and inspect. Strip out all floor coverings, wall finishes, and contents. Identify every entry point for water.
Step 2 – Cut a perimeter drainage channel. Using a disc cutter, cut a channel around the inside perimeter of the floor where it meets the wall. This is where the drainage pipe will sit.
Step 3 – Lay drainage pipe and gravel. Set a perforated pipe in the channel, bed it in clean gravel, and connect it to the sump chamber location.
Step 4 – Install the sump. Set a sump chamber into the floor at the lowest point, or at a position that allows easy pipework routing. The sump collects all water from the drainage system.
Step 5 – Fix the cavity drain membrane to walls. The studded membrane is mechanically fixed to the wall. It sits away from the wall surface, leaving a drainage void behind it. Water runs down that void and into the floor channel.
Step 6 – Pour a concrete screed. A new floor screed is laid over the drainage channel and gravel. This protects the drainage system and creates a level, usable floor.
Step 7 – Install the sump pump. A submersible pump sits inside the sump chamber. It activates on a float switch when water reaches a set level. Fit a backup pump if the basement is used as a habitable room.
Step 8 – Finish. Wall finishes, flooring, and partitions go over the completed system.
Internal waterproofing is practical, cost-effective, and works well, when it is installed to British Standard BS 8102 by a qualified contractor.
What Factors Should I Consider Before Waterproofing a Basement?
Not every basement needs the same solution. Work through these questions before committing to a system.
Where is the water coming from?
Water through walls differs from water rising through the floor. Rising groundwater requires a drainage system with a pump. Surface water or condensation may need only improved drainage and ventilation.
What is your site access like?
If your basement wall is directly adjacent to a pavement, boundary wall, or neighbouring property, external excavation is off the table. Go internal.
What condition is the structure in?
Waterproofing a structurally compromised wall fails fast. Cracks, spalling, and movement need structural attention before any waterproofing system is applied.
Is this a new build or an existing basement?
New builds have the luxury of choosing any system during construction. Retrofit projects are almost always limited to Type A internal tanking or Type C cavity drain systems.
How high is the groundwater table?
High groundwater creates sustained hydrostatic pressure. That pressure pushes water through hairline cracks and construction joints. A cavity drain system with a reliable pump handles this better than a membrane alone.
How will the basement be used?
A habitable room needs a BS 8102 Grade 3 waterproofing standard. A storage area may only need Grade 1. The grade determines the specification and the cost.
FAQs
How to waterproof a basement?
Identify your water source, choose between external membrane or internal cavity drain installation, repair structural defects first, and have the system installed to BS 8102 by a specialist contractor.
How do you waterproof a basement?
Most homeowners use an internal Type C cavity drain membrane system combined with a sump pump. It handles active water ingress without requiring excavation and works reliably on older properties.
Can you waterproof a basement from the inside?
Yes. Internal waterproofing is the standard retrofit approach. It intercepts water that enters through walls and floors, channels it into a drainage system, and pumps it out. It does not stop water entering the wall itself, but it prevents it from reaching the interior.
Which method is best for my basement?
New build: use Type B integral concrete or Type A external membrane. Existing basement with active water ingress: use Type C cavity drain with a sump pump. If you are unsure, get a site survey from a qualified structural waterproofing specialist before spending money on any product or system.
Conclusion
Basement waterproofing is not complicated in principle. Water enters through walls, floors, and joints. You either block it, build against it, or manage it. For most homeowners retrofitting an existing basement, a cavity drain system with a sump pump is the most reliable and practical solution. External membrane systems work best on new construction. Whichever method you choose, fix structural problems first, work to BS 8102, and use a contractor with documented experience in structural waterproofing , not just a damp-proofer with a tube of sealant.