
Water doesn’t care about budgets, timelines, or reputations. For contractors working on below-ground or below-grade construction in the UK, getting waterproofing right the first time isn’t just a quality issue; it’s a liability issue.
Done well, waterproofing protects a structure for decades. Done poorly, it results in remediation bills that often exceed the cost of the original system, disputes with clients, and in residential projects, potential mortgage and resale complications for the property owner.
This guide walks through how contractors can implement waterproofing solutions effectively; covering system selection, site preparation, installation best practices, compliance with BS 8102:2022, and the professional habits that separate reliable contractors from those who come back to repair their own work.
Start With the Right System, Not Just the Cheapest Option
One of the most common reasons waterproofing fails isn’t poor installation; it’s poor specification. A contractor who applies a Type A cementitious coating to a substrate that needs a Type C cavity drain system will produce a result that looks finished on day one and leaks within months.
BS 8102:2022; the British Standard Code of Practice for the protection of below-ground structures against water ingress; classifies waterproofing into three types. Understanding each is essential before any installation begins.
Type A; Barrier Protection
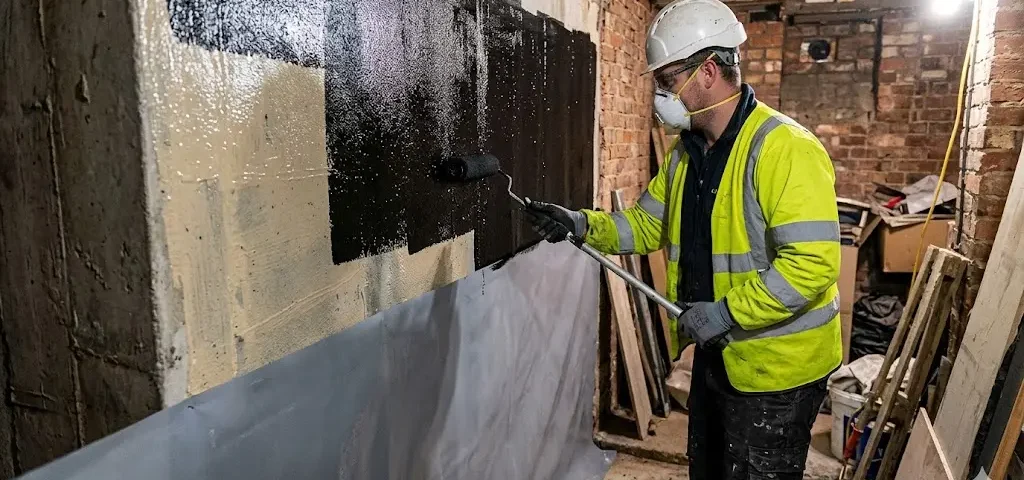
Type A systems use cementitious coatings, renders, tanking slurries, or bonded sheet membranes applied to the internal or external face of the structure to physically block water ingress. These are common in retrofits and simpler projects but are unforgiving of substrate defects. A single gap, missed corner, or poorly prepared surface creates a failure point that is difficult to locate and expensive to fix.
Type B; Structurally Integral Waterproofing
Type B relies on the structure itself to resist water; typically through waterproof concrete with admixtures or carefully detailed joints. It is invisible and largely maintenance-free when done correctly, but mistakes at pour stage or at construction joints are essentially irreversible. It is rarely suitable for heritage buildings or retrofit projects.
Type C; Cavity Drain Systems
Type C uses cavity drain membranes, drainage channels, and sump pumps to collect and redirect any water that enters rather than trying to prevent it entirely. It is the most flexible option for refurbishment and retrofit work, compatible with most substrates, and can be inspected and maintained over the lifetime of the building. For this reason, it is often the preferred approach in residential basement conversions and existing structure waterproofing in the UK.
BS 8102:2022 strongly recommends using combined systems; particularly Type B + Type C for new-build residential basements, and Type A or Type C combinations where Grade 3 (fully habitable) performance is required. Contractors should never treat these categories as mutually exclusive when the project demands higher performance.
Carry Out a Proper Site and Substrate Assessment
Even the most expensive waterproofing membrane will fail if the surface beneath it isn’t properly assessed and prepared. This is the step most commonly skipped or rushed on site; and it’s the step most commonly responsible for callbacks.
Before any waterproofing product goes on, contractors should evaluate:
- Water table level and seasonal variation
- Hydrostatic pressure the structure will face
- Substrate type, condition, and moisture content
- Presence of cracks, voids, or areas of structural weakness
- Previous waterproofing treatments and their condition
- Potential ground gas considerations (relevant to BS 8485)
Moisture testing is not optional. Applying a membrane over concrete that has not fully cured; or that still contains trapped moisture; leads to blistering, delamination, and early system failure. As a general rule, allow concrete to cure fully and test substrate moisture content before installing any membrane system.
For existing structures, laitance removal is often required. Laitance is the weak surface layer of fine particles that forms on top of concrete. It looks solid but prevents proper adhesion. Mechanical preparation; diamond grinding, shot blasting, or scabbling depending on project size; removes laitance and gives the waterproofing system a clean, sound surface to bond with.
Follow Installation Best Practices; Every Time
Good waterproofing isn’t complicated, but it is detail-oriented. The steps below represent the core installation discipline that separates durable systems from those that fail prematurely.
Apply Primer Where Required
Many liquid-applied and sheet membrane systems require a primer to improve adhesion and consolidate the substrate surface. Skipping this step; usually to save time or cost; is one of the most common causes of membrane delamination. Follow the manufacturer’s specification exactly, including drying times between primer and membrane application.
Detail All Vulnerable Areas First
Corners, pipe penetrations, drainage points, construction joints, and wall-to-floor junctions are the points where water most commonly finds its way through. These areas must be reinforced and detailed before the main membrane is applied to flat surfaces. Applying fillet beads at internal angles, using corner membranes or reinforcing bandage, and properly sealing around all penetrations are non-negotiable steps.
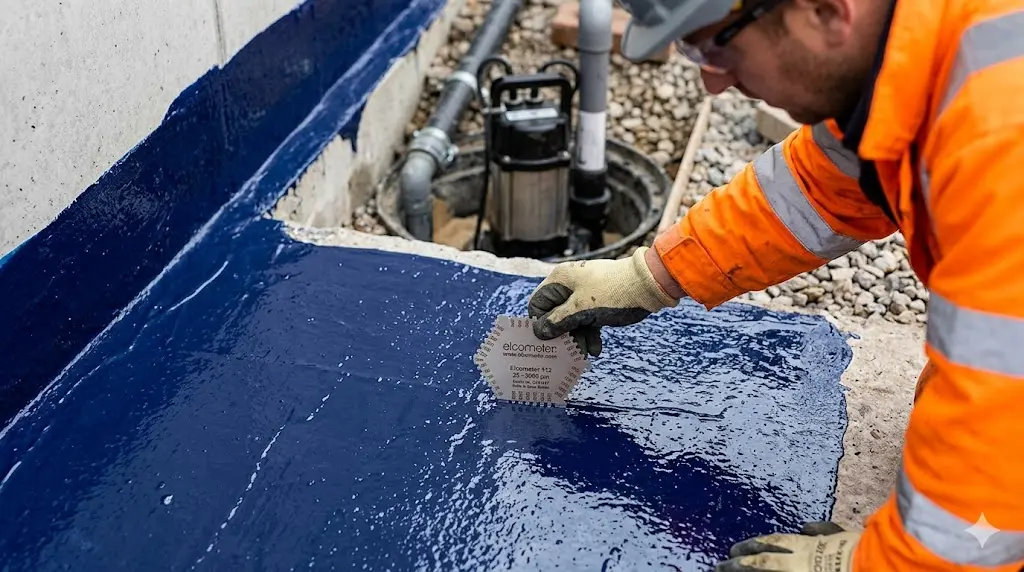
Control Application Thickness
Applying waterproofing membranes too thin creates pinholes and weak coverage. Applying them too thick in a single coat can trap moisture or cause uneven curing. Use a wet film thickness gauge when applying liquid membranes, and follow the manufacturer’s specified coverage rates. Multiple thinner coats applied in opposing directions typically outperform a single thick coat.
Respect Environmental Conditions
Temperature, humidity, and rainfall all affect how waterproofing membranes cure and bond. Most systems should not be applied in temperatures below 5°C or above 35°C, in direct strong sunlight, or onto wet or frost-affected surfaces. Check manufacturer data sheets before every application and protect newly applied membranes from rain during the curing period.
Flood Test Before Covering
Once a waterproofing system is installed but before it is covered by screeds, insulation, or finishes, a flood test should be conducted to verify performance. Covering a system without testing means any failures are hidden and inaccessible; and expensive to reach. Build flood testing into the project programme as a standard quality gate.
Understand Your Obligations Under BS 8102:2022
The 2022 revision of BS 8102 introduced several changes that directly affect contractors. The most significant is the requirement for a suitably qualified waterproofing specialist; typically a Certificated Surveyor in Structural Waterproofing (CSSW); to be involved in the design process before installation begins. This is not simply a recommendation. For projects requiring building warranty compliance or sign-off by building control, documented specialist involvement is increasingly expected.
As a contractor, your obligations under BS 8102:2022 include:
- Working from a specification produced or reviewed by a qualified waterproofing designer
- Installing systems in accordance with both the specification and manufacturer guidelines
- Documenting installation stages, particularly at junctions and penetrations
- Conducting and recording any required testing, including flood tests
- Handing over a complete installation record to the client and specifier
For Type C systems specifically, contractors must also communicate ongoing maintenance requirements to the client; particularly around sump pump testing and channel inspections. A system that is installed correctly but not maintained will eventually fail, and a contractor who did not communicate this is exposed to liability when that happens.
If your project involves a basement in need of expert specification or sign-off, working with a CSSW-qualified professional from the design stage protects both your client and your business. To understand what a CSSW brings to a project, see: What is a CSSW? The Role of a Certified Surveyor in Structural Waterproofing.
The Most Common Waterproofing Mistakes Contractors Make
Understanding where waterproofing projects typically go wrong helps contractors avoid the same pitfalls.
- Inadequate substrate preparation; the single most common cause of adhesion failure and membrane delamination.
- Applying membranes too early; before concrete has fully cured or before moisture content has been tested.
- Under-detailing junctions and penetrations; flat surfaces rarely fail; corners and pipe penetrations almost always do.
- Using a single system where a combined approach is required; particularly on high-risk or Grade 3 habitable spaces.
- Ignoring environmental conditions during application; leading to poor curing, blistering, or delamination.
- Failing to test before covering; hiding failures that become exponentially more expensive to address once buried.
- Poor documentation; leaving the contractor exposed when clients or warranty providers request installation evidence.
Work With the Specifier, Not Around Them
The relationship between contractor and waterproofing designer matters. The best results come when contractors engage with the specifier early, raise site conditions that differ from design assumptions, and seek clarification before improvising on-site.
If you encounter unexpected groundwater levels, substrate defects, or structural conditions that don’t match the design drawings, that is not a problem to solve silently on-site. That is information the waterproofing designer needs to revise the specification. Contractors who skip this step and make their own substitutions often produce systems that appear compliant but are not, and carry the liability when problems emerge later.
For projects where you need access to CSSW-qualified design support, specification review, or on-site technical guidance, CSSW Design works directly with contractors and developers across the UK to ensure waterproofing is designed and implemented correctly from the start.
The Bottom Line for Contractors
Effective waterproofing implementation comes down to three things: specifying the right system for the conditions, preparing the substrate properly, and installing with discipline and documentation.
Contractors who treat waterproofing as just another trade activity; something to apply quickly between other stages; are the ones receiving callbacks and remediation invoices. Contractors who engage with BS 8102:2022, work alongside qualified designers, and follow manufacturer specifications consistently are the ones building a reputation for reliable, complaint-free work.
For projects requiring CSSW-qualified design input, system specification, or compliance documentation, CSSW Design is available to support contractors and development teams at any stage of the project. Whether you’re planning a new-build basement, a residential conversion, or a commercial refurbishment, the right waterproofing strategy starts before the first product goes on; and that is exactly where we can help.
FAQ: Waterproofing for Contractors; Common Questions Answered
Q: What is the difference between Type A, B, and C waterproofing?
A: Type A uses barrier coatings or membranes applied to the structure’s surface to block water. Type B relies on the concrete structure itself (via waterproof admixtures) to resist water. Type C uses cavity drain membranes and pump systems to collect and redirect any water that gets in. BS 8102:2022 recommends combining types for higher-risk projects.
Q: Do contractors need a CSSW to install waterproofing?
A: The installation itself does not require a CSSW qualification, but BS 8102:2022 requires that the waterproofing design is produced or reviewed by a suitably qualified specialist; typically a CSSW. For most building warranty and building control sign-off purposes in the UK, documented CSSW involvement in the design stage is now expected.
Q: Why does waterproofing fail even when expensive products are used?
A: The most common causes of failure are inadequate substrate preparation, moisture in the substrate at time of application, under-detailing of corners and penetrations, and applying a system that is unsuitable for the site conditions. Product quality is rarely the issue; installation and specification are.
Q: How long should contractors wait before covering a waterproofing membrane?
A: Curing times vary by product and environmental conditions. As a rule, the membrane should be fully cured and flood tested before any screed, insulation, or finishes are applied. Always follow manufacturer data sheet guidance and do not rush this stage; hidden failures are significantly more expensive to remediate.
Q: What maintenance is required after Type C waterproofing installation?
A: Type C systems include sump pumps and drainage channels that require regular maintenance. Contractors should inform clients at handover that sump pumps need periodic testing, channel outlets should be kept clear, and annual inspection is advisable. Failure to maintain the system will eventually result in performance failure.
Q: Is BS 8102:2022 compliance legally required?
A: BS 8102 is a code of practice rather than legislation, but compliance is referenced in Building Regulations Approved Document C and is a standard requirement for most structural warranty providers and insurers. Projects that cannot demonstrate BS 8102 compliance may face warranty refusal or difficulties at building control stage.
Q: Can contractors use a single waterproofing system for all projects?
A: No. System selection must be based on site-specific factors including water table level, substrate type, required performance grade, and whether the project is new-build or refurbishment. BS 8102:2022 explicitly recommends combined systems for higher-risk structures. A one-size approach is a common route to installation failure.
Q: What preparation is required before applying a cementitious waterproofing coating?
A: The substrate must be structurally sound, clean, and free of laitance, dust, oil, and loose material. Any cracks or voids should be repaired. The surface should be dampened before application but not wet. Internal angles should be prepared with fillet beads. Primer should be applied if specified by the manufacturer.